This post is only over a year late, but hey..better late than never!! I took some photos when I was making paper wheel fans for Addison’s first birthday party with the intention of doing a “How To” on the blog! Since then I haven’t had the opportunity to actually write it, so now I’m making the time. I think a year is long enough to wait, don’t you?!
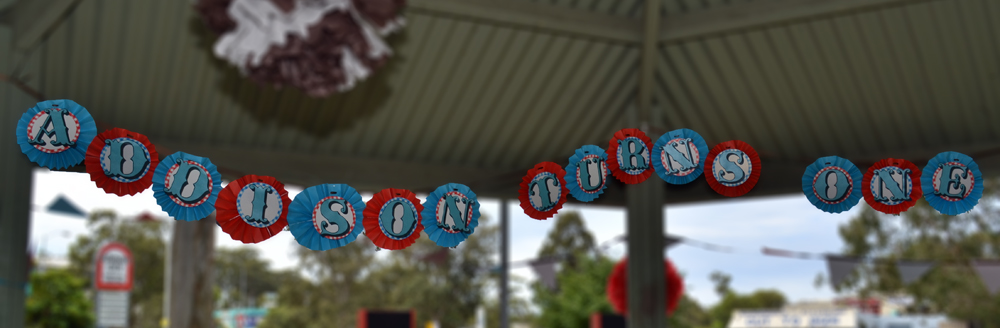
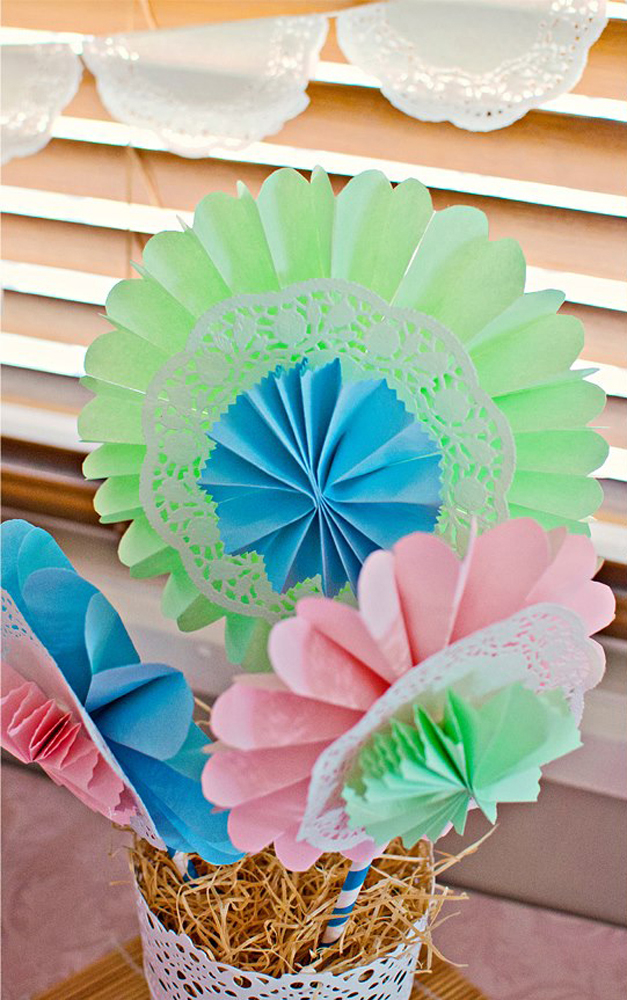
Firstly, you might be thinking what on earth is a paper wheel fan and what do you do with them? Well as you know I love party planning and especially anything that I can DIY. Paper wheel fans are folded paper made into a wheel used in party decorations. They can be used to make a banner (like I did for Addi’s party) or put on a stick as a stand alone decoration (like I did for my second baby shower). Paper wheel fans also look great grouped together in various sizes to make a back drop to a dessert table. I’m sure there are many other options for them too, these are just what I’ve done with them in the past.
HOW TO MAKE PAPER WHEEL FANS
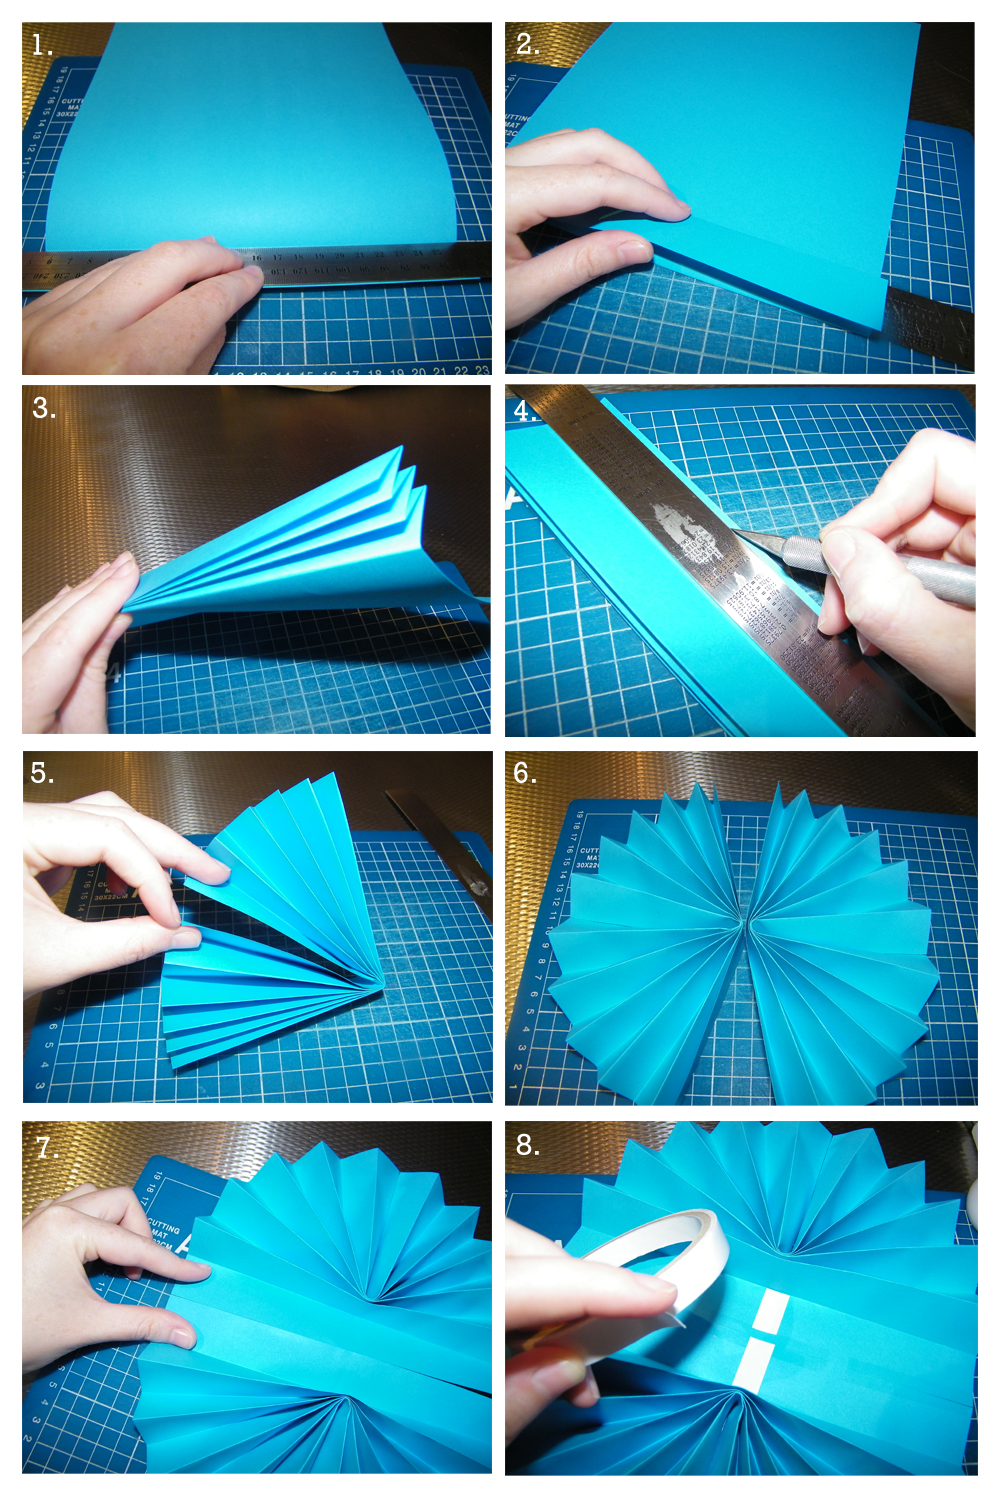
Step 1. and 2. Using an A4 piece of paper start by folding the paper like you would if you were making a fan. For a large paper wheel for something like a banner I use a ruler as a guide, but you can make a smaller fold for a tighter fan.
Step 3. and 4. Keep folding backwards and forwards until you have folded the entire piece of paper into a fan, trimming off any excess that you might have that doesn’t make a complete fold, with a ruler and knife.
Step 5. and 6. Fold your fan in half and join the two edges with tape. Now this part will depend on the size of the wheel fan that you are making, but for a large one you will need to repeat steps 1 to 4 to create a full circle. For smaller wheel fans you can cut one paper fan in half to create an entire wheel.
Step 7. Now we join the two fans (or halves) together with clear tape to make an entire wheel. Do this as neatly as possible so it still folds cleanly.
Step 8. Use a couple pieces of double sided tape front and back (so flip the entire thing over), squeezing the fan together. This will hold the two fan pieces in a wheel shape.
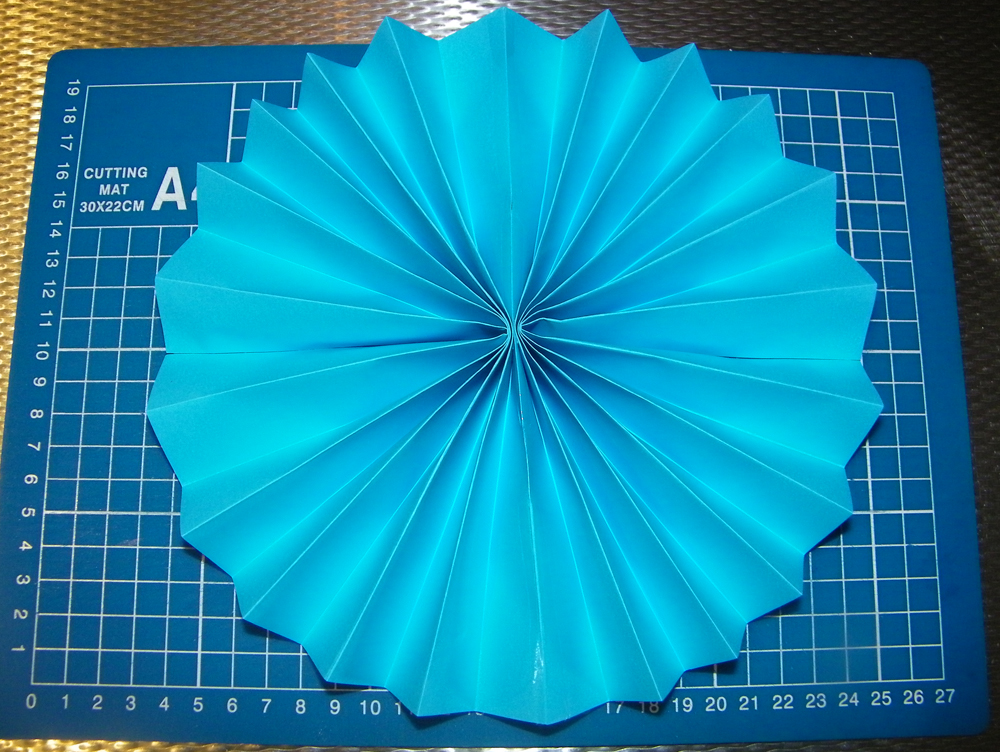
And there you have it, a completed paper wheel fan. You can make them in any colours you like, any paper you can find. Try making them in a variety of patterns, mixing and matching colours to get a great affect! For a different outer edge (like I used for the baby shower), simply cut the end of the paper fan (before folding it in half in step 5) in a rounded shape, zig zag or with scrap-booking scissors. Make all different sizes by cutting the paper fan shorter.